
 Dear iPhone users. If you are deeply annoyed and frustrated because of the Spam Calendar Invites in your iCloud account, then it’s time to get rid of those. Why I told you might be annoyed or frustrated because this is the most hot issue making it around the corner this moment. The Spammers leave no stone unturned to put you in trouble after spinning spam comments and unfortunately Apple has no solution to this issue at this moment.
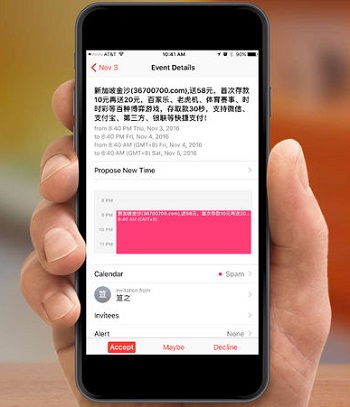
The spams go like this. Most of the time you might be receiving a Calendar invitation prompting you to ‘Accept’ or ‘Close.’ But non of the actions are fruitful as Accepting it you are in issues and if you Close, it simply moves into your iCloud calendar, un-responded box. No matter how many times you decline the invitation, the spammers don’t get affected and they keep on spamming and all the mails gather at the Junk folder. Even some of you might not be responding to the invitation at all because even declining the invitation will send a response to the spammer.
Must Click: How to Create or Delete an User Account on Your Mac
Such issues are really annoying, but unfortunately no official solution is there to it at this moment. But we have some temporary solution which will keep you away from such issues. Let’s have a look. It’s just the starter, Apple soon is assumed to serve the full mill to you.
Set the Calendar Invites to move into your Inbox
The first thing you can do is to set up your Calendar App Settings so that all your Calendar invitations will be sent to your Mail Inbox and there you can decline them to get rid of this. Now let’s see how we can set the Calendar App settings.
- First of all go to iCloud.com on your PC and use your Apple User ID and Password to log into your account.
- Then click on “Calendar” and click on “Settings” icon located at the bottom left corner of the screen that looks like a gear.
- There you will find a pop up Window in which you have to click the “Advanced” option.
- Then enter your Email ID in the box meant for Email ID under the option Receive event invitation as.
- After click Save.
Now all your invitations will be sent to your Email Account instead of Calendar. From there you can delete the events which are spam. Also you can create a spam calendar in the Calendar app of your iPhone. Easiest part of this will be to delete the Calendar which will delete all invitations inside. So you don’t have to delete all invitations one by one. So now let’s know how to create a Spam calendar.
How to create a Spam Calendar
- At first open the “Calendar App” on your iPhone and then tap “Calendars” at the centre bottom of your screen.
- Next click the ‘Edit’ option located at the upper left corner of the screen and next tap “Add Calendar” under iCloud.
- Now name the calendar as “Spam” and click Done.
- Now move back to Calendar View and tap on “Spammed Invitation.”
- After Tap ‘Calendar’ which is under the Invitation Name itself.
- It’s time to click on ‘Spam’ which will add the invitation to the “Spam” Calendar.
- Now again you need to move back to the “Calendar View”.
Also Read: iPhone 7 & iPhone 7 Plus Release Date confirmed, iPhone 7 Plus packs 3GB of RAM!
That’s all. Now you are done with creating the spam calendar. Now all your Spam invitations will be moved to the Spam Calendar App. And when you want to delete the Spam Calendar App, you can do follow the below mentioned steps.
How to Delete Spam Calendar
- From the “Main Calendar View,” tap ‘Calendars’ positioned at the bottom centre of the screen and then tap “Edit” at the top left corner of the screen.
- Next choose ‘Spam’ under iCloud and scroll down to locate the “Delete Calendar” option.
- Tap on “Delete Calendar” now and confirm the deletion process.
That’s it. Now you are done with the Deletion process. Following these steps, you will not face any issues to complete the process. Of course, it will not be a significant move to avoid the Spammers. But for sure you will get a temporary solution still Apple comes with a permanent one.