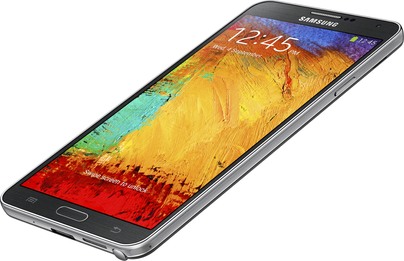
Prior to this we had informed you about the Samsung Galaxy LTE Smartphone had started receiving the Android 4.3 Jelly Bean OTA update and now we have got back to you with the rooting process of Android 4.3 XXUDMJ7 Jelly Bean for Samsung Galaxy Not 3 LTE. The process is so simple and there is scarce fear of your device getting bricked. What you have to do all is to follow the below given guidelines and root your device.
Before initiating the rooting process make sure that you are using this tutorial only for the Samsung Galaxy Note 3 LTE N9500. The tutorial is not meant for any other Samsung Galaxy Note 3 model.
Pre-Requisites
- First of all download and install the Samsung USB drivers in your device.
- Then disable all antivirus applications and Samsung KIES before initiating the installation process since these programs create havoc in the process.
- Go to the Developer Options Menu and enable USB Debugging there. If the Developer Option is not mentioned, then you have to do the same after tapping the “build number” option seven times in the About Phone section.
- Ensure that you have at least 50% power back up before you start the rooting process, so that your device will not power off in the middle.
- Make sure that the whole rooting process is your responsibility and only implement the rooting process in your device if you have some idea on the same. BlogZamana will never remain responsible for your device getting bricked or losing of any important data.
- Ensure that you have read and understood the whole tutorial before starting the rooting process.
Rooting Android 4.3 XXUDMJ7 Jelly Bean for Galaxy Note 3 LTE N9005
- First of all download the CF Auto Root zip for your device.
- Next Download Odin3 v3.07.
- Now extract the contents of the zip file and save the folder to your desktop.
- Now switch off your device and boot your device into Download mode. You can do this by pressing & holding the Home, Power and Volume (Down) buttons all at a time. Once the Warning! Menu appears release all buttons and press the Volume key up to bring your device into Download mode.
- Now launch Odin exe on your PC.
- Now connect your Smartphone device to your PC via USB cable. In case the ODIN does not recognise the device, you have install the Samsung Drivers again and start the rooting process again from step 4.
- Click the PDA button in Odin and upload the extracted files (in step 3) in Odin. Ensure disabling Re-partition before uploading the files, but no need to change any default file.
- Now click Start to begin the rooting process. Once the rooting completes, Odin commands “Pass” and your device reboots in Normal Mode.
- Wait for the Samsung Boot Animation Screen to appear and then disconnect the phone from your PC. Walla! Now wait for the booting process to get completed and you will get the all new Jelly Bean firmware in hands.
In case, your device doesn’t complete the root process, then it enters into boot loop mode or you might experience some other problem. In that case, disconnect your device from the PC, take out the battery, reinsert it and follow the entire tutorial again. In case you face any further problem then feel free to ask us in comments.

Does this root makes me lose my warranty?
Does it touch knox?
Of course.
Hi I am so excited I found your weblog, I really found
you by mistake, while I was looking on Digg for something
else, Anyways I am here now and would just
like to say thank you for a incredible post and a all round entertaining blog (I also love the theme/design), I
don’t have time to read it all at the moment but I have bookmarked it and also added your RSS feeds, so when I have time I will be back
to read a lot more, Please do keep up the fantastic job.