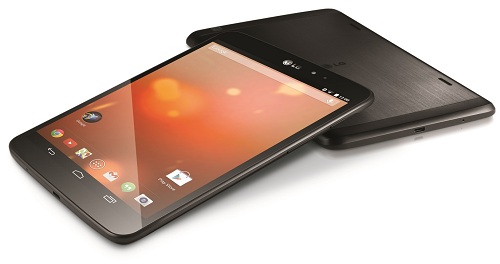
Great going for the LG G PAD 8.3 GPE users. This is the next-in-ray device post the Nexus devices to receive the official Android 5.0 Lollipop Operating System. The update is being rolled out via OTA and most probably will reach your handset at any time. But for the users who have already installed the Custom ROM firmware, but have not received OTA update still now, this step-by-step manual guide will help them to flash this new official OS to their device. This new OS will enrich your device with a number of noteworthy features and brand new design language that will make your Smartphone look distinct and colorful than ever. Now let’s go through the below mentioned guide to flash this brand new firmware to your handset.
Caution
First of all double check the Name and model number of your device from the About Device section of your Smartphone, before starting the update process since this guide is only meant for the LG G PAD 8.3 GPE. Using this tutorial in other devices or even of other models of same series might harm your device drastically. Keep in mind that BlogZamana will no way remain responsible for any sort of issues like Bugs, Brick of device or Dead SD Card, if your device experiences any during the installation process. What you do is on your own risk.
Pre-Requisites
- One LG G PAD 8.3 GPE Smartphone.
- Original Data Cable.
- One PC preloaded with LG G PAD 8.3 GPE drivers. Else at first download and install the drivers on your PC from LG’s official website.
- Enable the USB Debugging Mode. You will find the option in the Developer Section of your device. Don’t forget to disable it post update.
- Back Up all important data in your Android device since the update will erase all data.
- Keep at least 60% to 70% battery back up in your LG G PAD 8.3 GPE device to avoid accidental shut down during installation.
Downloads
- Android lollipop 5.0 OS package
Steps to Update LG G PAD 8.3 GPE with Android 5.0 Lollipop OS
- First of all download the above mentioned firmware package and extract it to a folder in your PC. Now connect your Smartphone to your PC via USB.
- Now open the folder where you have placed the extracted file and Right click in an open area press the Shift Key and Right Click.
- Now will appear a pop-up menu from where you have to select the option “Open command prompt here”. Now a command window will appear on your screen.
- Type the below given command in the CMD to check if your device is properly connected to your PC. When you enter the command, the CMD will return the device ID. If this doesn’t happen, then know that the device drivers are not properly installed on your PC. Re-install those.
adb devices
- Next you have to type the following command to put your device into Stock Recovery mode.
adb reboot recovery
- Now will appear an Android Logo with an ! mark. Then press the Volume Up+Power Button and release those instantly to boot your device into Stock Recovery Mode.
- Then use the Volume Key to scroll to the Apply Update from ADB option and use Power key to select it. Then enter the below mentioned command in the CMD.
adb sideload 3e00c98ade9ceb594409c8e038739d3e4f3cd1c3.signed-KTU84P.L002_user-LRX21P.L004_user_update.zip
The update takes a considerably long duration to finish. Wait patiently still the update finishes. Once the update finishes, use the power button to select the Reboot system now option. That’s it. Your device will reboot and will make the paths open for you to enjoy the brand new Lollipop firmware. You must not face any issues in the update process since it’s easy to apply. Still if you face any issues like bootloop or lags, then make a factory reset and everything will be all fine to initiate the process from the beginning. Be careful while handling the update since little mistakes might brick or corrupt your device. In case of any issues, forget not ping us back in the comment section.
