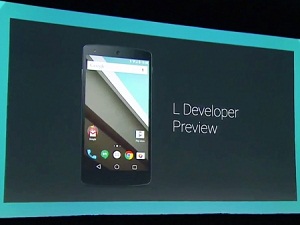
Nexus 5 & Nexus 7 users! We have pretty good news for you. Now it’s Android time for you. I mean, now get ready to enjoy the brand new material design interface of Android L on your Smartphone. With the just released Android L, competition has geared pace among users to update the latest developer preview on their Smartphone devices. Then what you wait for. Get stand and go! But before beginning the update don’t forget to take an ardent look on the pre-requisites that the process essentially requires.
Caution
First of all double check the Name and model number of your device by going to the About Device section of your Smartphone. Since this update is only meant for the Nexus 5 & Nexus 7 Smartphones, using this tutorial in other devices might harm your device drastically. [highlight]Since this is a test build, it might come with certain bugs. So keep in mind that BlogZamana will no way remain responsible for any sort of issues like Bugs, Brick of device or Dead SD Card, if your device experiences any during the installation process. What you do is on your own risk.[/highlight]
Pre-Requisites
- One Nexus 5/Nexus 7 Smartphone.
- Original Data Cable.
- One PC preloaded with Nexus 5/Nexus 7 drivers (as per your requirement). Else at first download and install the drivers on your PC from LG’s official website.
- Enable the USB Debugging Mode. You will find the option in the Developer Section of your device.
- Back Up all important data in Android your device since the update process might erase all data.
- Keep at least 60% to 70% battery back up in your Nexus 5/Nexus 7 to avoid accidental shut down during installation.
Downloads
- Android L image for Nexus 5
- Android L image for Nexus 7 (2013) (Wi-Fi only) model
- Fastboot/ADB files for Windows, Mac
Steps to Update Nexus 5/Nexus 7 with Android L Developer Preview
- First of all download and save the files from the given links as per your need.
- Now open the cmd in your PC and enter the command “cd USERNAME/desktop/android”.
- Now you have to enter your device into bootloader mode. To enter your Nexus 5 into bootloader mode, first switch off the device and then press and hold the Volume Up+Volume Down buttons +power button. To enter your Nexus 7 into bootloader mode, first switch it off and then press the Volume Down+Power buttons.
- Now connect your Smartphone to your PC via USB and to ensure that your device has been detected in your PC, enter the command “fastboot devices”.
- NB: If you are a MAC user, don’t forget to add the prefix “./” before each command. For instance, if you are a Mac user and enter the above command, then it will be . /fastboot devices.
- After unlock the bootloader of your Nexus device by giving the command fastboot oem unlock. Confirm unlocking of your device by pressing the Volume Up button.
- Now it’s time to flash the Android L on your device. If you are a Windows user, then enter the command flash-all.bat and if you are a Mac user then enter the command ./flash-all.sh
That’s it! The command will automatically flash the factory image in your Nexus device and will reboot automatically. Take note that the process will take considerably long time and hence you need not worry for the long duration. Just have patience still the flashing is complete. In case find any issues in the rooting process, get back to me in the comment section and I shall get back to you with a solution.
