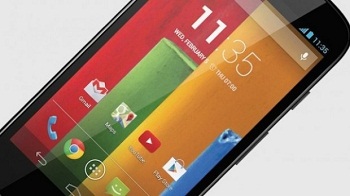
In my previous articles I informed you how you can root and unlock the bootloader in your Motorola Moto E Smartphone and in my today’s article I shall guide you through the step-by-step guide to update your Moto E handset with the recently released Cyanogen Mod 11 based Kitkat 4.4.4 Custom ROM. As per the latest information, the Moto E users now can update their handset with this recently released Custom ROM right now. This recently released Custom ROM will make your device a more worthy Moto E with enriched features like Customizable navigation bar, Lock screen customization, Dual Pane Options, Slider shortcuts, Battery display options which includes the styles, Do not disturb option, icons and font types, Shown notification count feature, Custom Boot animation options, Custom Bean stalk wallpapers, Quick settings color options, Super user quick access from Settings, Clock widget for Lock Clock including extra options to fully customize, Status bar can be customized, Pie control based lock screen, High end graphic effects option, Keyboard and input method options that include disabling full screen keyboard and auto rotate and Customized clock and date options.
Now let’s move to the steps that you must follow to flash this Custom ROM in your Moto E device. But before that you need to take a look on the pre-requirements dubbed essential for the flashing.
Caution
Make sure to double check the Name and model number of your device before starting the installation since it’s only meant for the Mototrola Moto E Smartphone. Using the process with other device might hard brick your device or create bugs in it. Be sure that BlogZamana will not remain responsible for any sort of issues like Bugs, Brick of device or Dead SD Card, if your device experiences any during the installation process. What you do is on your own risk.
Pre-Requisites
- One Motorola Moto E Smartphone. Ensure that your device has been both rooted and its bootloader has been unlocked.
- Original Data Cable
- One PC preloaded with Moto E drivers. Else at first download and install the drivers on your PC from Motorola’s official website.
- Enable the USB Debugging Mode. You will find the option in the Developer Section of your device.
- Back Up all important data in Android your device since the update process will erase all data.
- Keep at least 60% to 70% battery back up in your Moto E Smartphone to avoid accidental shut down during installation.
Downloads
- Custom ROM Firmware
- Google Apps Package
Steps to Update
- First of all download the Custom ROM Firmware and Google Apps Package on your PC and place those on the desktop.
- No need of unzipping the files.
- Now connect your Smartphone to your PC via USB Cable and move the files to your phone. Unplug your device.
- Now take your Smartphone into recovery mode. To do this first of all press the volume down+Volume Up button + Power button simultaneously. Your device will enter into bootloader mode. From there choose the option ‘enter into recovery mode’.
- Wipe the data and clear cache from recovery mode menu. For that select wipe data factory reset and then choose wipe cache partition.
- Now opt for advance and then select wipe dalvick cache.
- Now return to the main menu in Recovery mode and select “choose zip from SD card” and then click “install zip from SD card.” Choose the the custom ROM you placed earlier in your device and flash it following the flashing of the Google Apps Package.
- The flashing will tale up to 4-5 minutes. Have patience still the whole process completes successfully. Finally select “reboot system now” and now your device will be rebooted with the new OS.
In case your device stucks in bootloop sequence, then you have to turn off your device and begin the update from the first following the same steps. To turn off your device, reinsert your battery or long press the Power button.
Now you have successfully flashed the Cyanogen Mod 11 based Kitkat 4.4.4 Custom ROM in your Motorola Moto E device. In case you find any issues in the updation process, feel free to get back to us for a solution via the comment section.
