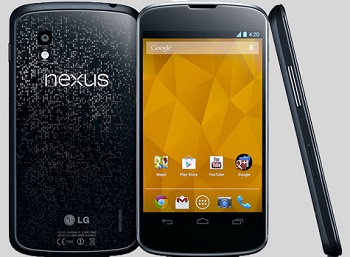
The Google Nexus 4 Smartphone can now be flashed with the Android 5.1.1 Lollipop Factory Image. One new 5.1.1 Lollipop Factory Image is right now available for the Google Nexus 4 handset. The factory image is named after Android 5.1.1 LMY48M and can be used for complete Factory reset of your handset. If you have already flashed a Custom ROM on your Google Nexus 4 Smartphone, then this Factory image will help your device to restore to the stock Lollipop OS. So if you are not aware how to flash this factory image on your Google Nexus 4, then I shall guide you through the steps here in this article.
But before initiating the update, you need to have a complete knowledge of the requirements that are essential for the update. Else you might end in corrupting your Google Nexus 4 handset and thereby loosing all access to your device.
Requirements
- Use this Factory Image only for the Google Nexus 4 and no other device.
- Back up your all phone data such as SMS, MMS, contacts, call logs, multimedia etc. so that they don’t get wiped out during procedure.
- Download and install the Google Nexus 4 drivers on your PC so that it can be easily connected to your Smartphone.
- Charge the phone at least to 60% battery power to carry on the process.
- Disable the security services in your computer
- Enable the USB Debugging by tapping on Settings-> Applications-> Development-> tick the USB debugging. Untick USB Debugging after everything is completed.
Since this update process is bit tricky, so you need to be an advanced Android user for completing the process. Make sure that We at BlogZamana will not remain responsible if anything wrong happens to your device because of the update. So it will be all your responsibility.
Steps to Update
- At first download the Android 5.1.1 LMY48M factory image folder and extract it to the desktop of your PC.
- Then place all the extracted files on the platform-tools folder in the SDK and then open a CMD window in the same folder.
- Then switch off your Smartphone and put your device into Bootloader mode and after connect your device to your PC via USB.
- Enter the adb devices command on the CMD to ensure your Google Nexus 4 has been rightly connected to your PC. If connected, then proceed to the next step.
- Now search for the flash-all.bat script and launch it to initiate the factory image installation. Confirm process and wait still all the files are successfully flashed.
- Once the flashing is finished, you will get a confirmation massage on your Google Nexus 4. Now reboot your phone and disconnect the USB.
That’s it. Finally you have flashed the Android 5.1.1 LMY48M factory image file on your Google Nexus 4. If it takes bit more time than usual to fast boot your device, then don’t worry because the files will take little more time before it loads all the files and features. For any issues concerning the update process, let me know in the comment section. I shall try to find out a solution for you.

